How To Paint A Kingfisher In Oils
Kingfishers are stunning little birds, most people have never seen one, and if you are lucky enough to see one it’s usually flying past at a million miles an hour. Our local wildlife centre here in Cilgerran, in west Wales, has a very healthy population of kingfishers, which I’m lucky enough to see regularly. Not just the million miles an hour variety either, often a bird will sit on a perch and fish right in front of you – see some of my kingfisher photographs here.
I’ve painted kingfishers before, but this painting was going to be a little different and an exciting challenge. I’d decided to use a panoramic canvas, have a very simple empty background, and try and paint that background in a soft, slightly out-of-focus way, to help the kingfisher stand out.
See how it went below, as the stages progressed from start to finish.
1)
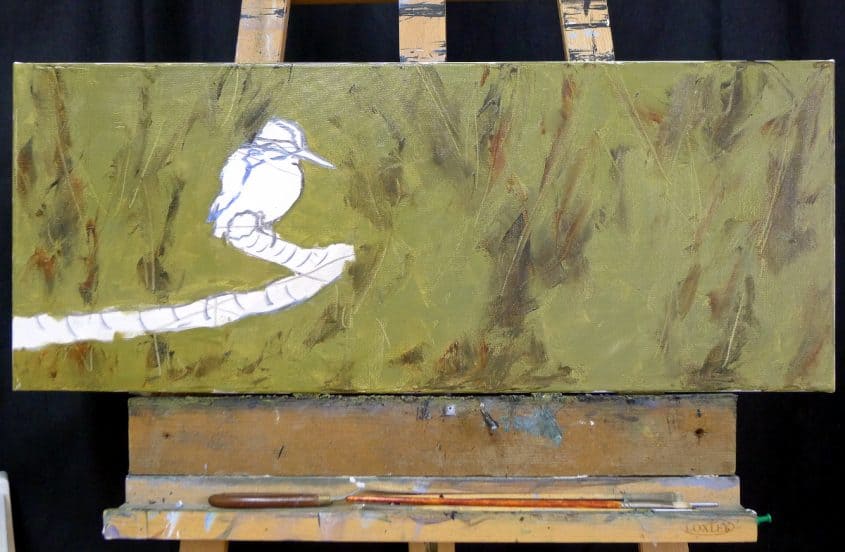
After sketching out the basic design, using a palette knife I blocked in the background with a thick mixture of raw sienna, ultra marine blue, lemon yellow and burnt sienna. I painted this very loosely and left darker areas here and there for variety, at this stage it was just a matter of getting plenty of paint on the canvas in roughly the right colour.
2)

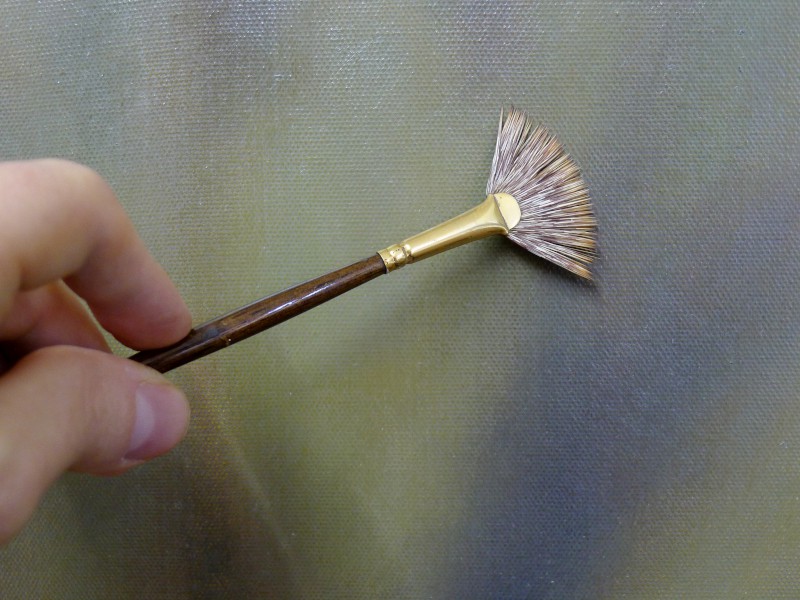
For the next stage of this kingfisher painting, whilst the thick background paint was still wet, I used a fan brush and worked over the whole background with crisscross brushstrokes softening and blending all the hard edges, go give it that slightly out of focus ( bokeh ) look.
Next was the fun part, I started to map out the kingfisher over the top of that background, just trying to get the main colours in roughly the right place, so that I could use these as a gauge to correct the tones and colours later as the painting progresses.
3)
I then started to add more detail to the kingfisher and the branch, using smaller brushes and to get more control and detail. I also started putting paint on the branch with a palette knife, using a palette knife allowed me to create texture as well as add colour, which helps give the illusion of wood.
I used smallish brushes, size 4 and 6 flats, to add paint to the Kingfisher, painting over what I already had and gradually building up the depth and detail, whilst all the time correcting and adjusting what was already there.
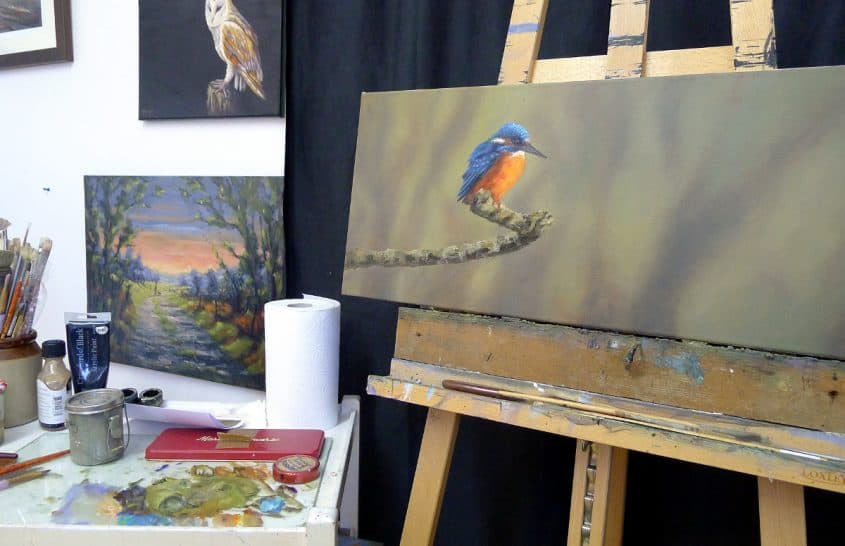
4)

I used a small synthetic bristle brush to add lots of detail, it has a sharp edge perfect for this purpose. You can turn the brush 45 degrees to use the corner of the bristles for very fine work too, meaning there’s no need for a rigger brush to achieve very fine work.
5)
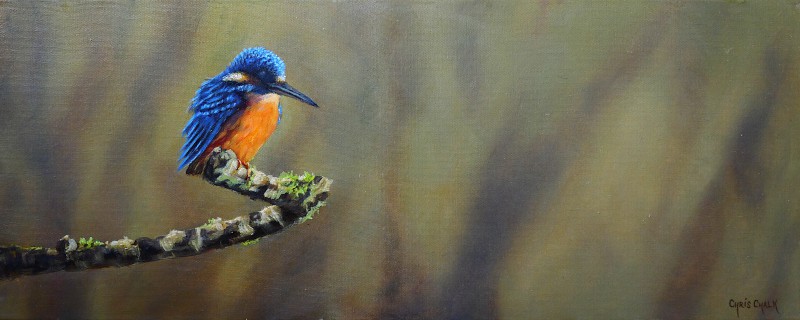
The finished Kingfisher painting.
After letting the painting sit for a few weeks I added a coat of retouching varnish, this helps brighten up the colours and get rid of any uneven sheen a finished oil painting can sometimes have.
This original Kingfisher painting has now sold, but you can visit my prints page and buy Kingfisher prints here.
Update 2019: See my my latest large kingfisher painting here.
If you have any questions about this painting or any other queries please get in touch.
Chris
Hi,
How do you get the background from Stage 1 to Stage 2 ? How do you achieve that blurred effect ?
Thanks
Whilst the paint is still wet, use a fan brush to soften the edges. Brush up, down, left, right… in all directions so as not to create any lines. You want to blend the edges so that there are non. You can only do this with fairly thick, still wet paint.