So you’ve just taken the most amazing photograph of a Tiger at the zoo and you would quite like to paint it – great!
Now if only there were an easy way of transferring your tiger photo onto your canvas/paper so you can, and that didn’t involve a lot of maths or drawing lots of tiny gridded squares everywhere.
Well luckily there is, and it’s a method I use all the time for tricky subjects like portraits, pet portraits and sometimes wildlife paintings.
Let me show you how:
Aspect Ratio (height in relation to its width)
The only thing you need to keep in mind with this method is the aspect ratio of both your photo and your canvas/paper.
So if your printed photograph is say 15cm x 10cm, that is a ratio of 3:2.
i.e
- 3 x 5cm = 15cm (photo width)
- 2 x 5cm = 10cm (photo height)
This means that your canvas/paper must also have the same 3:2 ratio (important).
The easiest way to achieve this is to manipulate your photograph on your computer before you start, either by cropping, resizing or adjusting the print size ( You can get excellent FREE image manipulation software here at http://www.gimp.org).
Be careful when resizing photos to change the aspect ratio though, as this can make them look out of proportion if overdone (you don’t want a tall skinny tiger, or short fat tiger). It’s best to crop your image as close as you can get to the correct aspect ratio, and only then resize your image to get it exactly right.
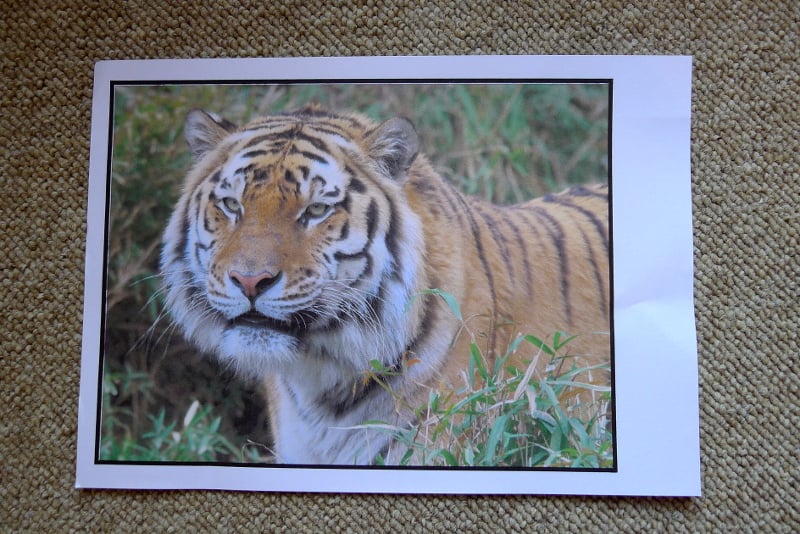
In the example below, I have a 16 x 12 inch canvas, and I’ve printed out my reference photo at 10 x 7.5 inches. Note that the canvas and photo are NOT THE SAME SIZE, this doesn’t matter, but they are the SAME ASPECT RATIO, this matters. They are both are 4:3 or 4×3.
My tiger photograph:
- 4 x 2.5 inch = 10 inch (photo width)
- 3 x 2.5 inch = 7.5 inch (photo height)
And my canvas:
- 4 x 4 inch = 16 inch (canvas width)
- 3 x 4 inch = 12 inch (canvas height)
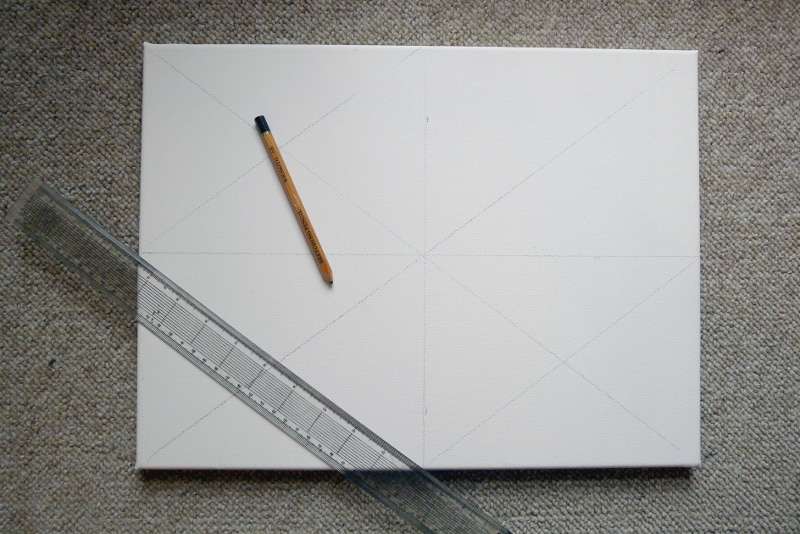
Stage 1)
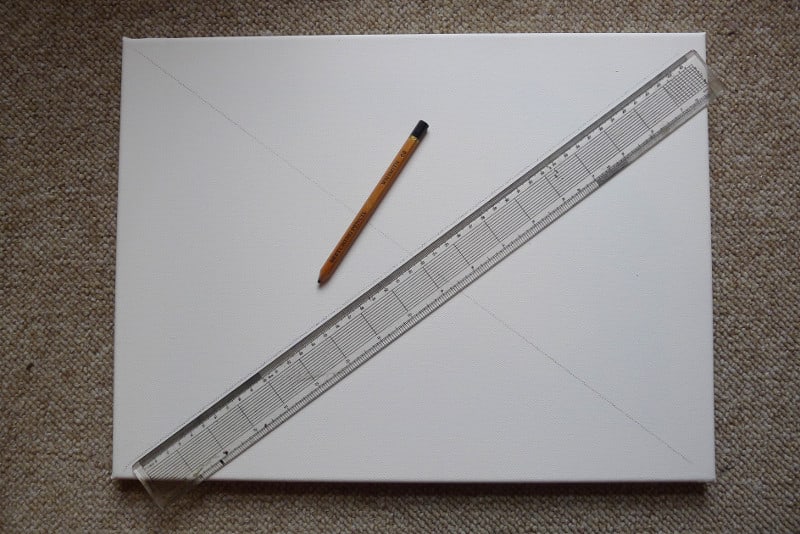
To start, use a ruler to draw lines diagonally from the corners to the corners. Effectively making a big cross in the middle of your canvas/paper.
Stage 2)
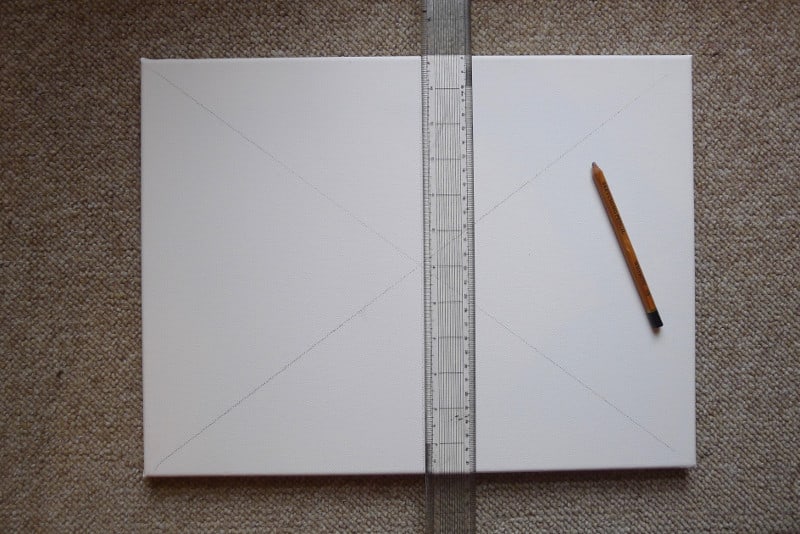
Now measure half way across the bottom of the canvas and make a mark, do the same at the top of your canvas. Draw a line along these two points to divide the canvas into two halves, a left side and a right side.
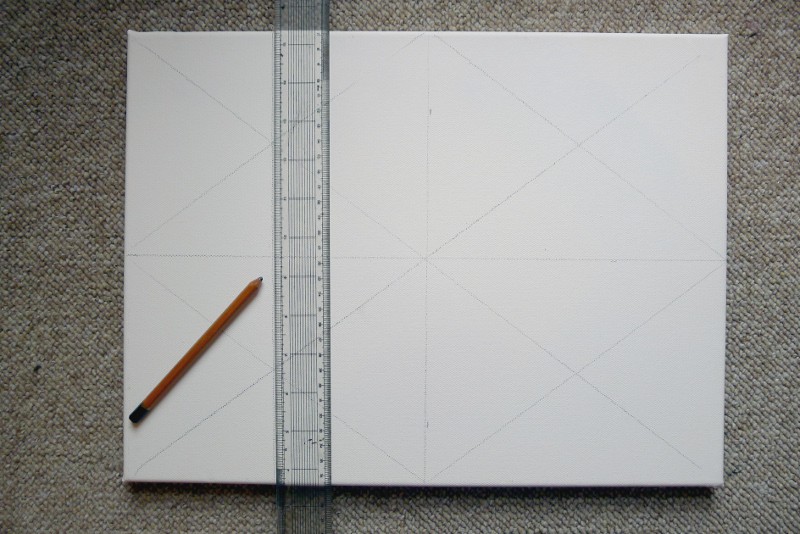
Stage 3)
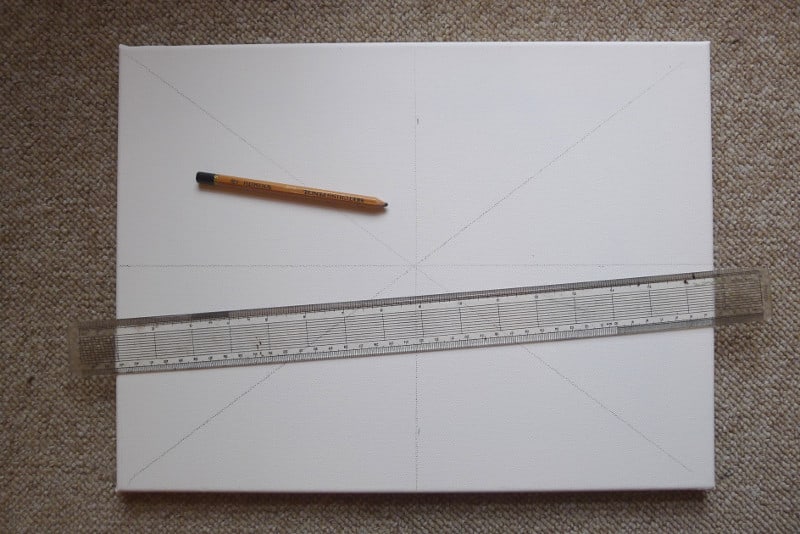
Follow the same principle for dividing the canvas into two, top and bottom.
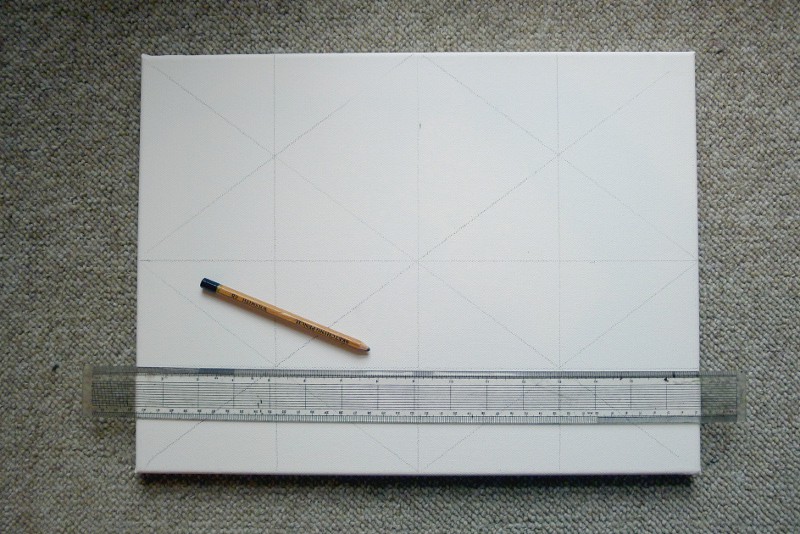
Stage 4)
Draw diagonal lines through each of your new 1/4 canvas squares.
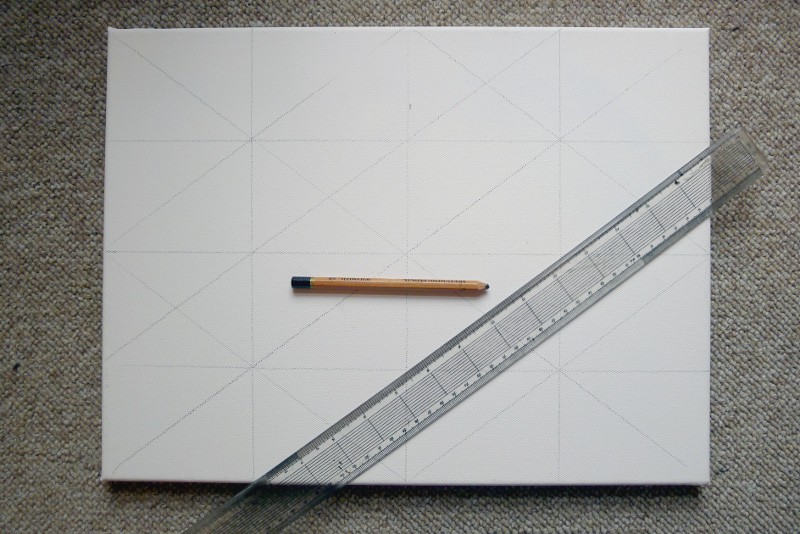
Stage 5)
Now place your ruler vertically where the cross-points meet and draw a line vertically, top to bottom.
Stage 6)
Follow the same principle to draw lines through the intersections horizontally.
Stage 7)
Now divide the canvas further by drawing lines through the intersections diagonally that haven’t been lined though yet.
Stage 8)
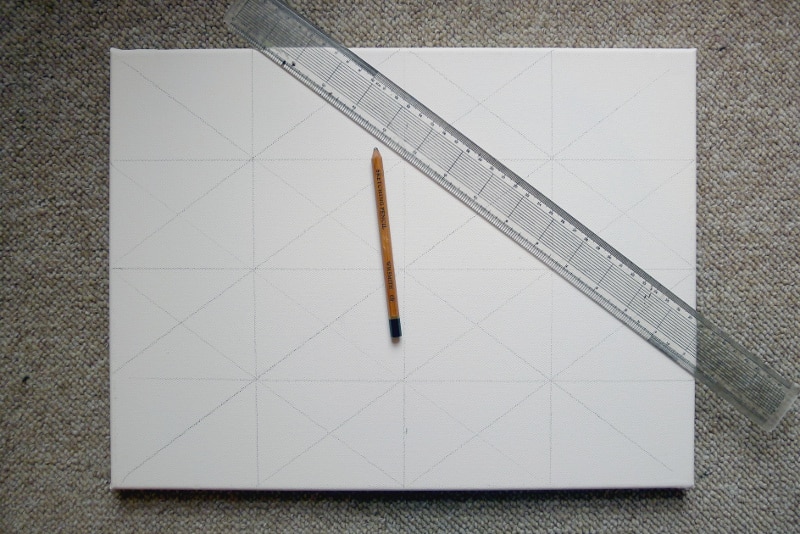
Draw lines through those same intersections the other way.
Stage 9)
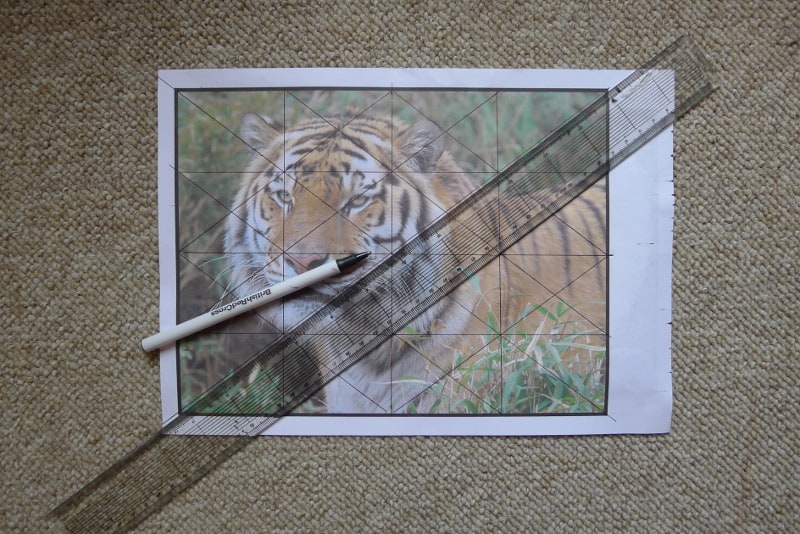
Now print out your reference photograph, and using a ruler divide it up in exactly the same way you just divided up your canvas.
Stage 10)
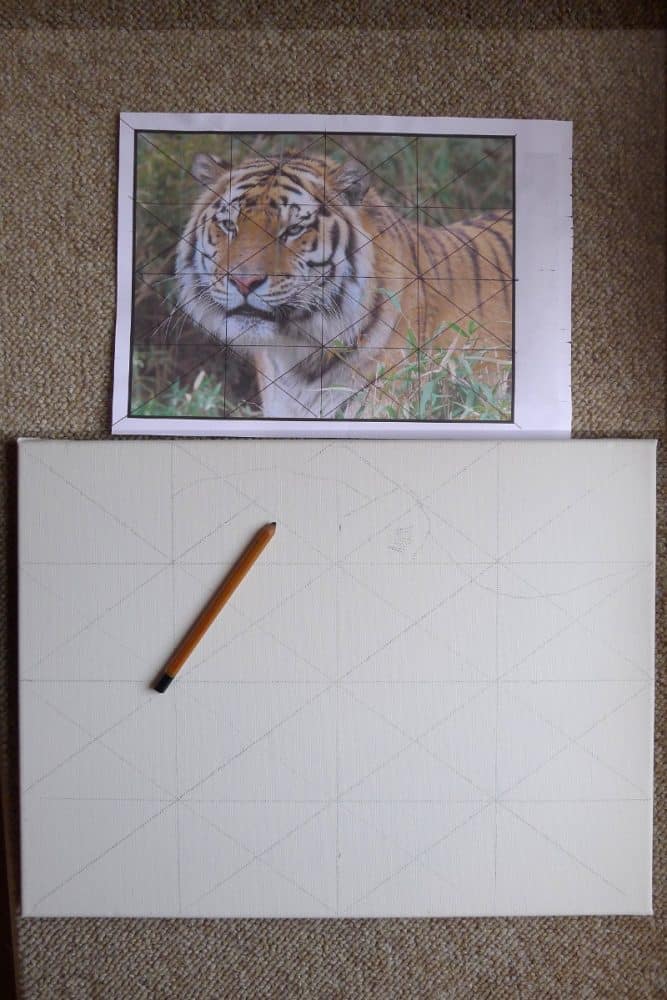
Let the fun begin: all you need do now is transpose what you see in each of the new sections you’ve made on the photograph, onto the corresponding sections you’ve made on your canvas, as I’ve started to do above.
If you find it’s still too difficult to draw your photograph onto your canvas, sometimes the case if your image is very detailed, you could keep going with the principles above and continue to divide your photograph up further, into even smaller sections.
If your photograph is very complex, or you think there is still too much room for error, keep going and divide each small triangle on both canvas and photograph further.
This is the method I use for all of my portrait and pet portrait paintings. I rarely use this method when painting landscapes as I seldom want my landscape paintings to resemble the photograph that accurately.
Give it a go and let me know how you get on. If you have any problems get in touch.
See the finished tiger painting here.
Happy painting
Chris
I look forward to some great comments below, and if you enjoyed this post and found it useful, please share it, thanks.


Great tip!
I’ve only used squares before. It looks like the diagonal lines would be a huge help toward keeping each section aligned correctly.
Also, I love how this method has a minimal need for measuring marks–which reduces the risk of several tiny errors in measurement marks compounding into noticeable distortion errors in the the final painting.
Thank you!!!
I’m looking forward to trying this and I’ll let you know how is goes.
Hi Stephanie, I’m glad you found this useful. This method is so much easier than gridding-up in the conventional way, and as you say, it avoids all the measuring and maths. Do let me know how you get on, happy painting. Chris
You’re welcome Martha, glad you found it useful.
Chris
I understand same aspect ratio grinding but struggle when gridding a reference picture of DIFFERENT aspect ratio. Is there a simple, readily understandable formula for those of us who aren’t mathematically inclined?
Hi Hilary, the gridding method above only works if the aspect ratio is the same on the reference photo as the canvas/paper you intend using. So you have to crop, or reshape, any reference photo first to the same ratio as the canvas/paper. Chris
Thanks – I understand that the method above only works for the same aspect ratio: my question was whether there is an understandable formula to apply where the aspect ratio is different, to calculate how to modify (crop) the reference photo/picture. I have seen formulae, but how to apply them (for me…) lacks clarity. It is not always possible to chose a canvas of the same aspect ratio, unfortunately.
Hi Hillary,
The only way I’m aware of is to crop your ref image to the same ratio as your intended canvas/paper. Say your canvas is 16×12 inch (a ration of 4:3), you crop your ref image to the same ration, in mm, cm, inches, pixels.. whichever you prefer. So an image of 8×6 inches, for example, would also be a 4:3 ratio ( 4x2inch = 8 by 3x2inch = 6 ).
Chris
An 11 X 14 does not come out to even ratio numbers–what would the image size be? How do you figure ratios?
Not sure what you mean Peggy, do you mean your image is 14×11… and you’re trying to transfer it to a canvas?
Help, I majored in Art not math!
My reference photo is 8×10
My canvas is16x20
What are my ratios???AAHHH
Hi Kathy, both 10×8 and 20×16 are 4:5 ratio (5x2=10 4x2=8 also 5x4=20 4x4=16) so you don’t need to do anything accept start gridding them both up as per my images above and start transposing your image from your image to your canvas ~ Chris