No matter how careful we are with our artwork, canvas paintings can get damaged. Some of the most famous paintings in the world have sustained damage over the years and have needed repairs made to the canvas. What at first can seem like a complete disaster, is in fact usually repairable, so let me show you how to preform a canvas painting repair, and fix a damaged or ripped canvas painting.

NOTE: If your painting just has a dent in it, read how to get a dent out of a painting here.
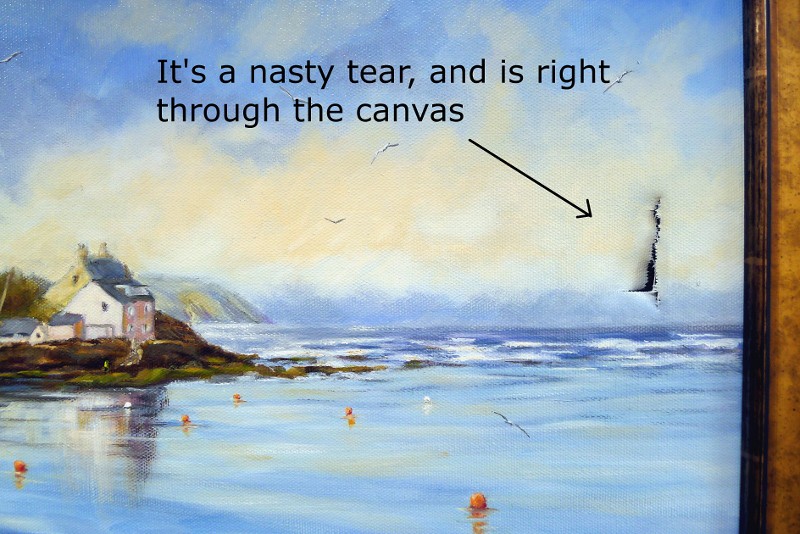
The damage to the painting above happened when a friend, who was visiting my studio, accidentally knocked over a wooden print stand, the corner of which pierced this painting as it was on the floor leaning up against the wall. You can see the damage to the canvas was quite substantial, not only had the rip gone right through the painting, but the canvas had torn in two directions, both diagonally and horizontally.
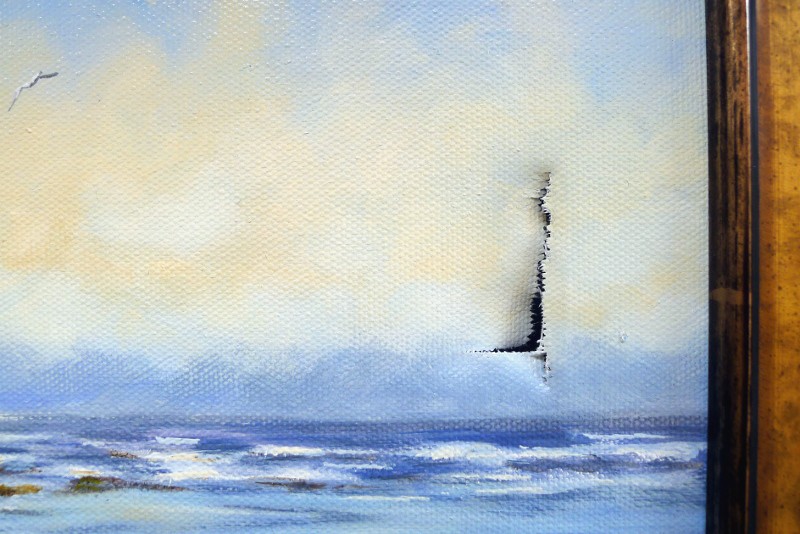
You can see here that the fibres of the canvas were pulled apart when the damage occurred, leaving a jagged uneven edge.
If this painting were a priceless Rembrandt I would align all of the individual fibres of the canvas and glue each one back together separately. However, this painting is priceless Chris Chalk, and as he (me) is still around to repaint the damaged area after the repair, I can make a simpler repair.
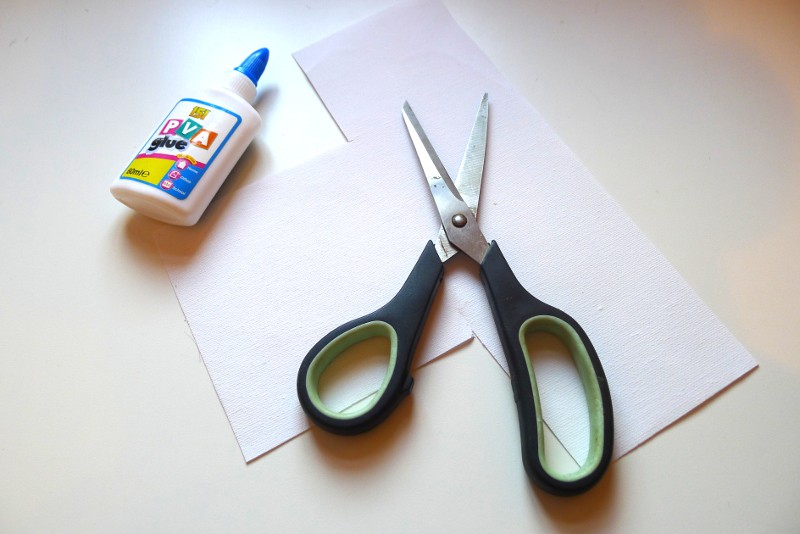
To repair a damaged or torn canvas painting you’ll need:
A pair of sharp scissors.
A piece of canvas the same ( or at least similar) to that of the original canvas.
Some acid free glue (in this case PVA – Polyvinyl acetate).
A flat piece of MDF or hardboard.
A weight, or something heavy to use as a weight.

First using your scissors to cut a piece of your spare canvas to make a patch. Make sure when you do this the patch is large enough to cover the damaged area of the painting, plus at least 3cm extra overlap, so that the patch can be glued to plenty of undamaged canvas around the tear. Once you’ve cut your patch to the correct size, apply PVA glue to one side of it.
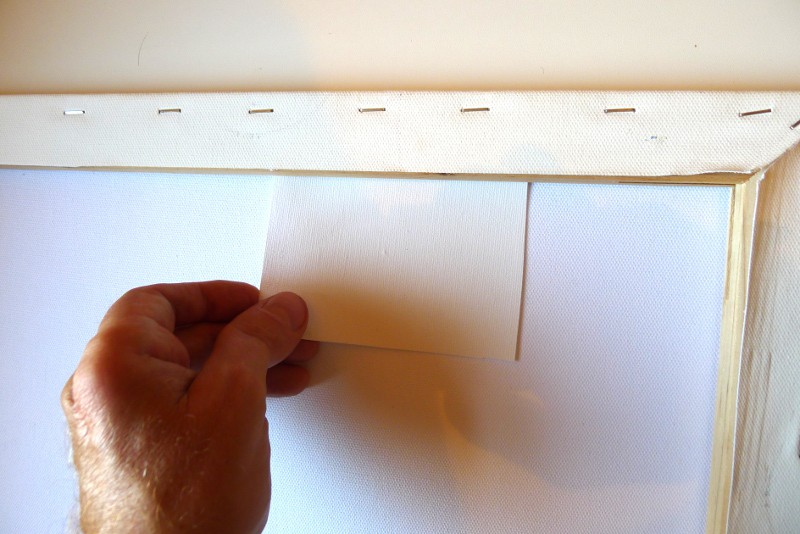
With the painting laying face-down on a clean flat hard surface, offer-up the canvas patch to the back of the painting and push it down into position. Make sure you’ve applied enough PVA glue so that every part of the patch is glued to the original canvas. If you have any excess PVC that get’s pushed out from under the patch just wipe it up with a wet cloth, PVA is water soluble and cleans-up easily.
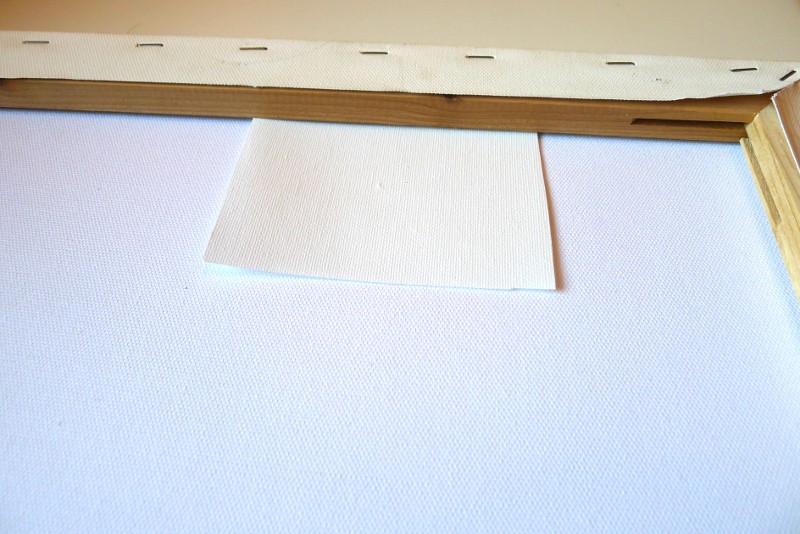
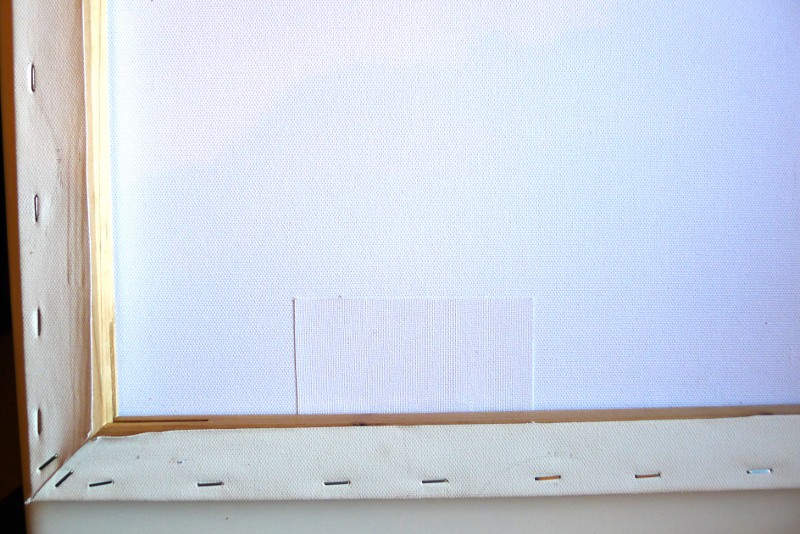
Make sure the new patch is in the correct position and that the damaged area of the canvas is under the middle of the new patch. You can see here, because the damage to my painting was near the edge of the painting, to achieve that I’ve had to push part of my new patch under the wooden stretcher-bar.
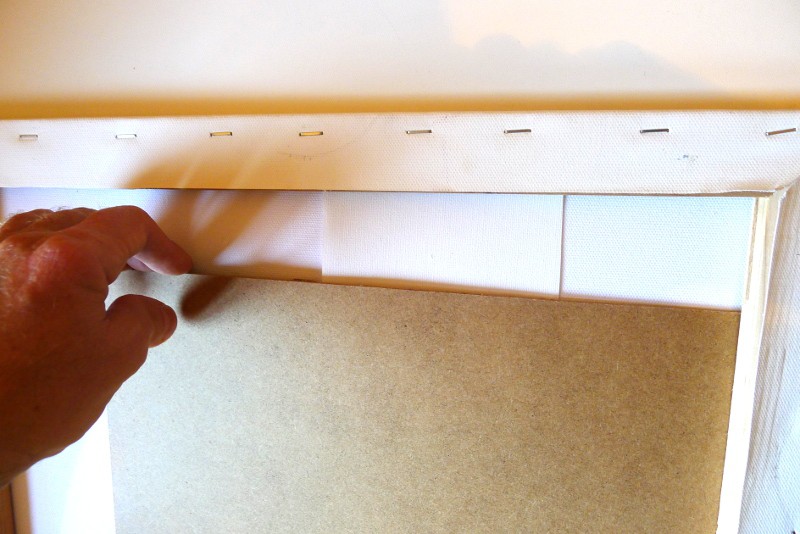
Once the patch is placed in the correct position we need to place another flat surface down onto the back of the patch so that as the glue dries it creates a perfectly flat repair. I’m using a thin sheet of hardboard to do this.
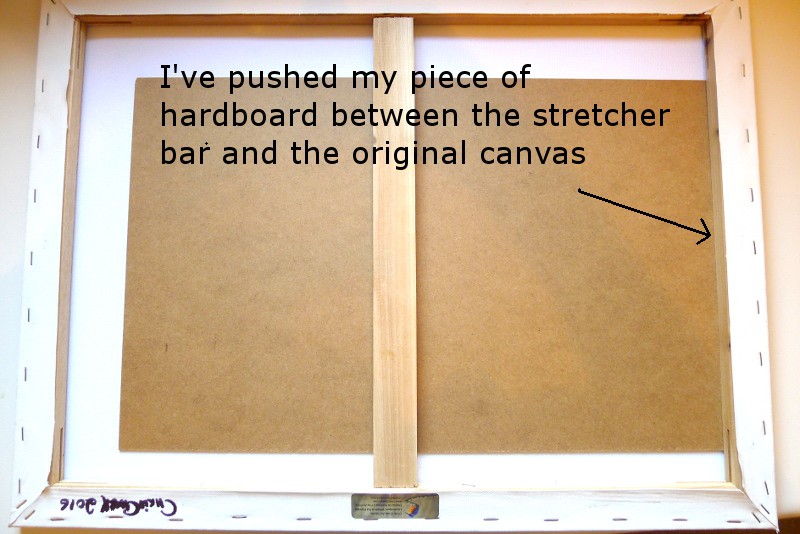
Again, because the damage in my case is very near the edge of the painting, I have had to push the thin sheet of hardboard I’m using between the original canvas and the wooden stretcher-bars, not just in the middle of the painting, but also on the right-hand edge.
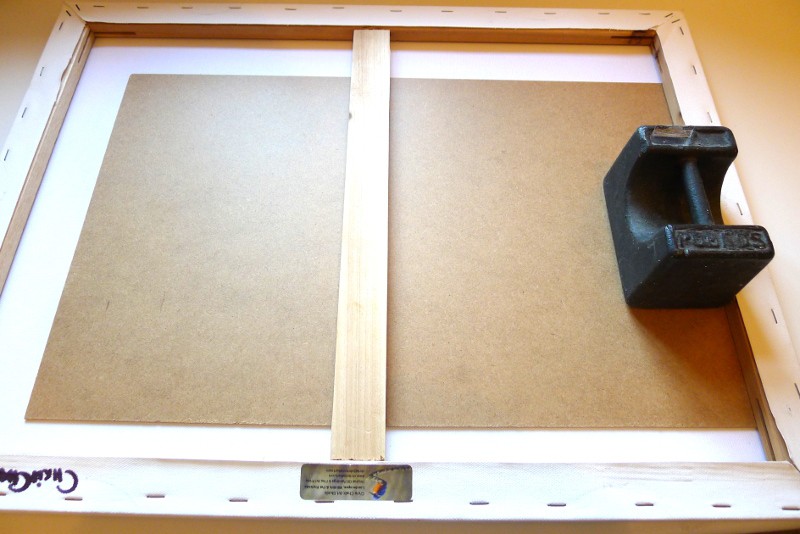
Once you’ve got you patch applied and your piece of board laying flat on top of it, you need to place a weight of some description on top of that to keep everything is position and to make sure a good bond is formed between the patch and the original canvas. Once you’ve done that you need to let the PVA dry for at least 24 hours before doing anything else.
Once the glue had dried and you’ve removed the piece of hardboard and the weight your repair should look something like this.
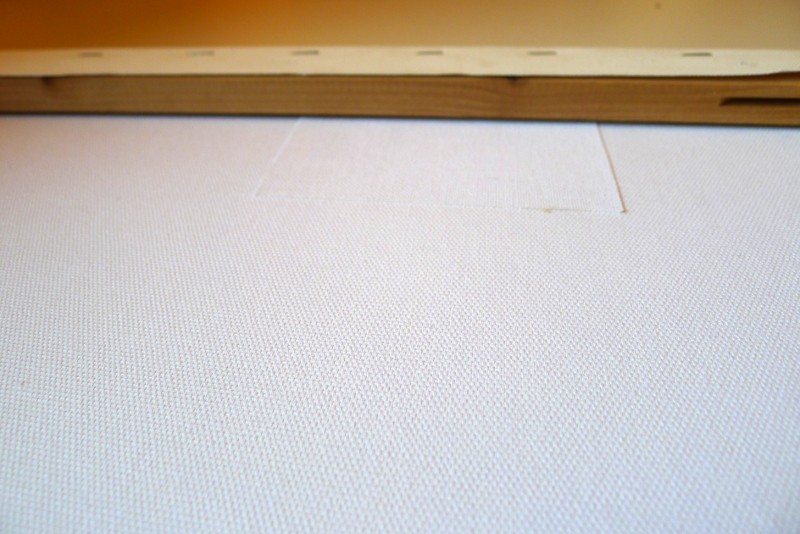
The new canvas patch should be glued to the original canvas right up to the edges. If it isn’t, and the edges of the patch can still be lifted up, you’ll need to work a little more PVA glue under the unglued edges with match stick (or something similar), replace the board and weight onto the back of the painting, and wait another 24 hours for that to dry.
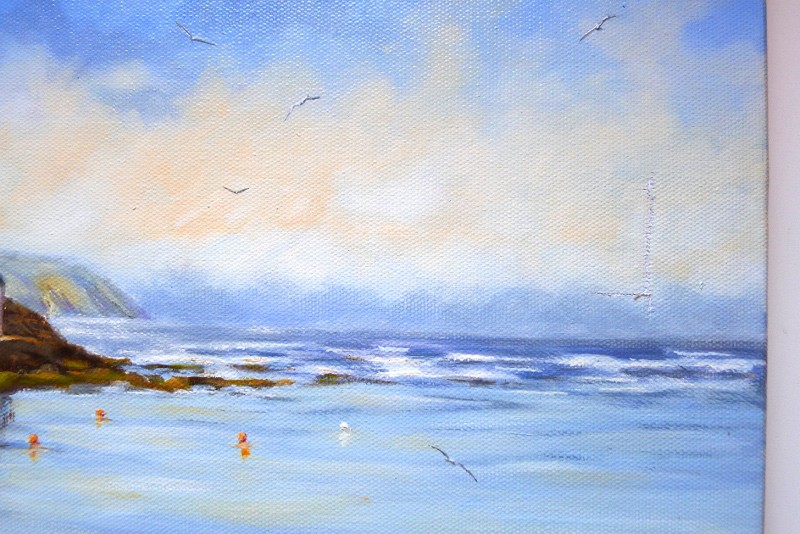
This is what the front of my painting looks like after the patch repair has been made to the rear.
If you look closely you can see my repair was very successful. The canvas is even and flat once again, and all the edges are lined up well. You can however see that there are some stray/loose fibres, that’s not a problem, we’ll sort that out next.
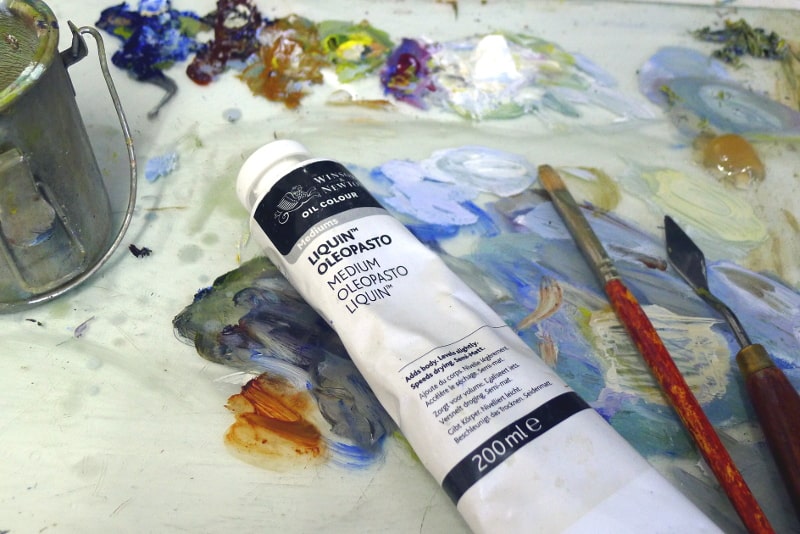
To paint over the repaired area I mix a little Liquin Oleopasto medium into the paint that I use. Liquin is a medium that artists can add to oil paint and is mainly used to speed up drying times in every day oil paining, Oleopasto is just a much thicker form of this medium and helps to fill in any indentations in the repaired area as I repaint.
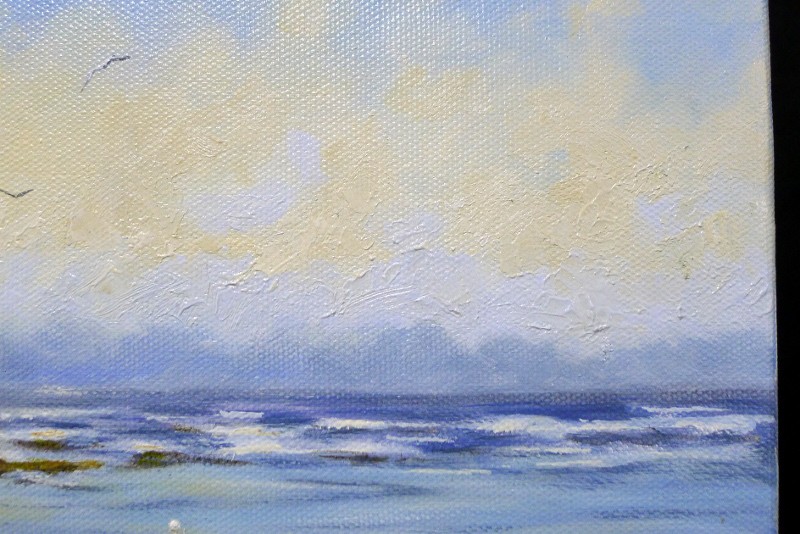
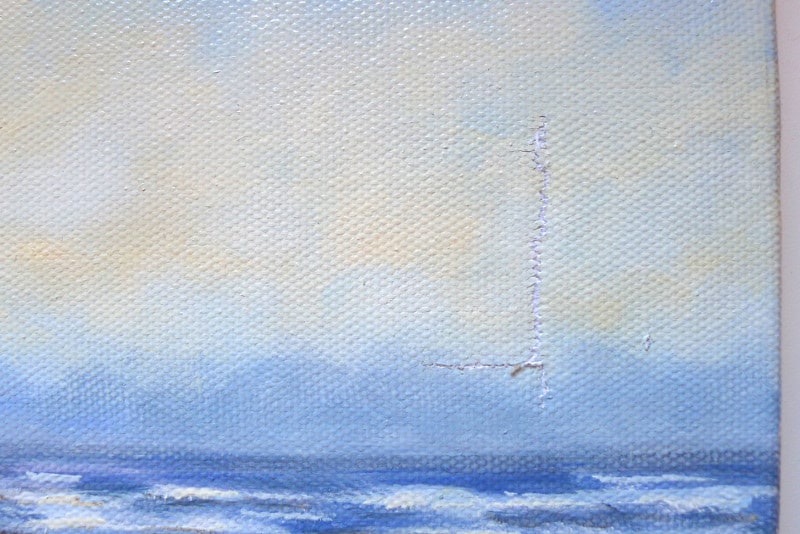
One of the keys to fixing a torn of ripped canvas like this is to re-paint more than just the area you’ve repaired, and when you do, the new brushwork should match that of the rest of the original painting. In my case some other parts of my original painting are painted with quite thick loose paint, namely the foreground wall and rocks, but some of the waves too, so I painted the repaired area in a similar style.
You can see I repainted right down to the horizon line, which I used as a handy natural break for my repainting.
For the process of repainting I used a palette knife to mix plenty of new paint/oleopasto mix, and put that paint on quite thickly and deliberately uneven using both a brush and a palette knife. If the paint looked too uneven I smoothed it out a little, if it looked too even I stippled it up with my brush. The idea is to match the existing original brushwork as best you can.

The final result is a permanent repair that will last as long as the rest of the painting, and one that is unnoticeable, unless you look at the back of the painting.
* read this post if you just want to get a dent out of a painting canvas.
If you have any questions get in touch.
Chris

Thanks for such easy-to-follow, clear instructions on fixing a torn canvas! Are you able to put a repaired painting up for sale? If so, would you add this information to the description of the painting? Thanks!
Looking for expert who can repair canvas painting spoilt by fungus and moisture
Try contacting your local museum or art gallery, they use art restoration services regularly. Good luck.
I have a brand new large canvas that our puppy decided to teeth on. It is damaged on one corner about three inches in. How do I repair it?
Hi Gwen, just follow the steps in this post, if the damage isn’t too serious it should be repairable ~ Chris
Does the canvas you’re using to repair it with need to be stretched?
No, if it isn’t a large repair it doesn’t matter. If it is a large repair, wet the canvas afterward when the glue has dried and the canvas will tighten up ~ Chris
Freaking grateful for this! I accidentally had one fall today and it’s one I did of my pup. I’m depressed about it. Needed this info.
Glad it was helpful, Alanna.
Does wood/craft glue or fabric glue work too?
Hi Jessica, fabric glue would work I assume, but I’ve not tried it. PVA is quite cheap though, and readily available. Best of luck ~ Chris
Hi Chris,
Can you use a regular canvas fabric or drill cotton to repair? I cannot get a small piece of painting canvas without buying a whole roll or large piece which is expensive. Thanks.
Hi Maria, if you’re repairing a tear, for example, canvas fabric would probably suffice. If your damage is more substantial, perhaps an area of canvas is missing, then the rigidity of painting canvas would be better. Perhaps you could buy a small cheap painting canvas from a art shop and then cut out what you need? ~ Chris